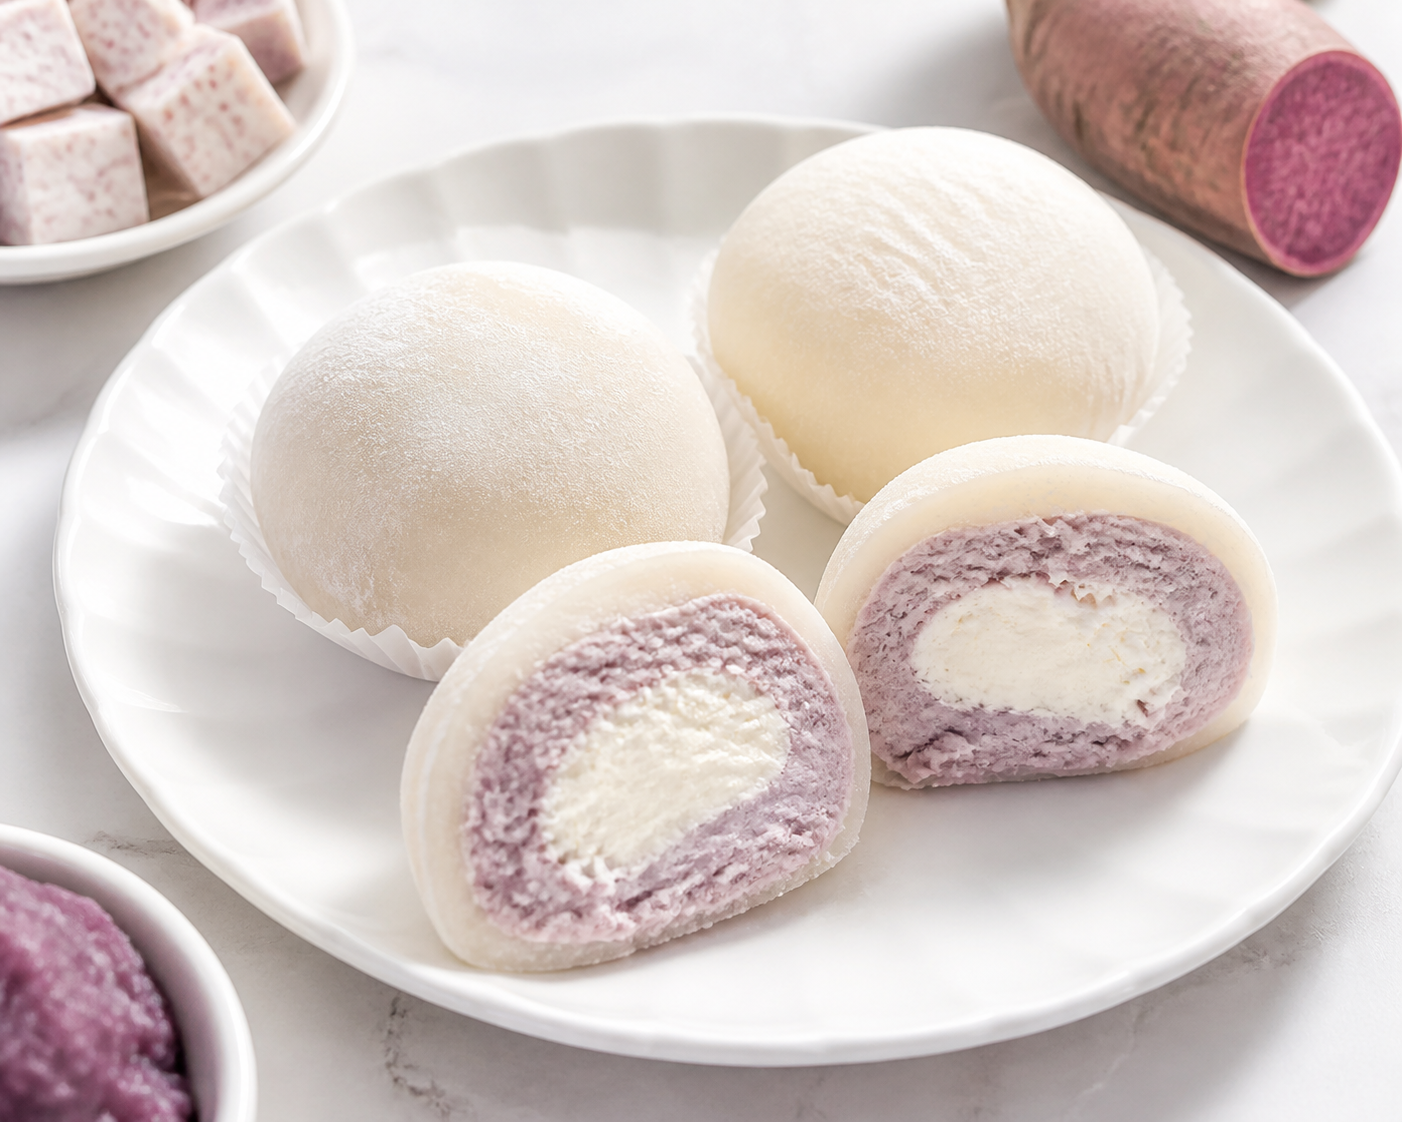
Taro Mochi Snow Skin Dumplings
芋泥雪媚娘yù ní xuě mèi niáng
- Time
- 2 h
- Difficulty
- Very Hard
- Calories
- 160 kcal
- Yield
- 1 serving
Taro Mochi Snow Skin Dumplings have a soft, chewy outer skin filled with smooth, sweet taro paste and light cream, offering rich layers of texture. This Chinese Dessert is born from home-style creativity. Taro and purple sweet potato provide dietary fiber and anthocyanins, while Milk and Light cream supply calcium for a balanced nutritional profile.芋泥雪媚娘外皮软糯 Q 弹,内馅是细腻香甜的芋泥与轻盈奶油,口感层次丰富,是一道源自家常创意的中式甜品。芋头和紫薯提供膳食纤维与花青素,牛奶和淡奶油补充钙质,营养均衡。
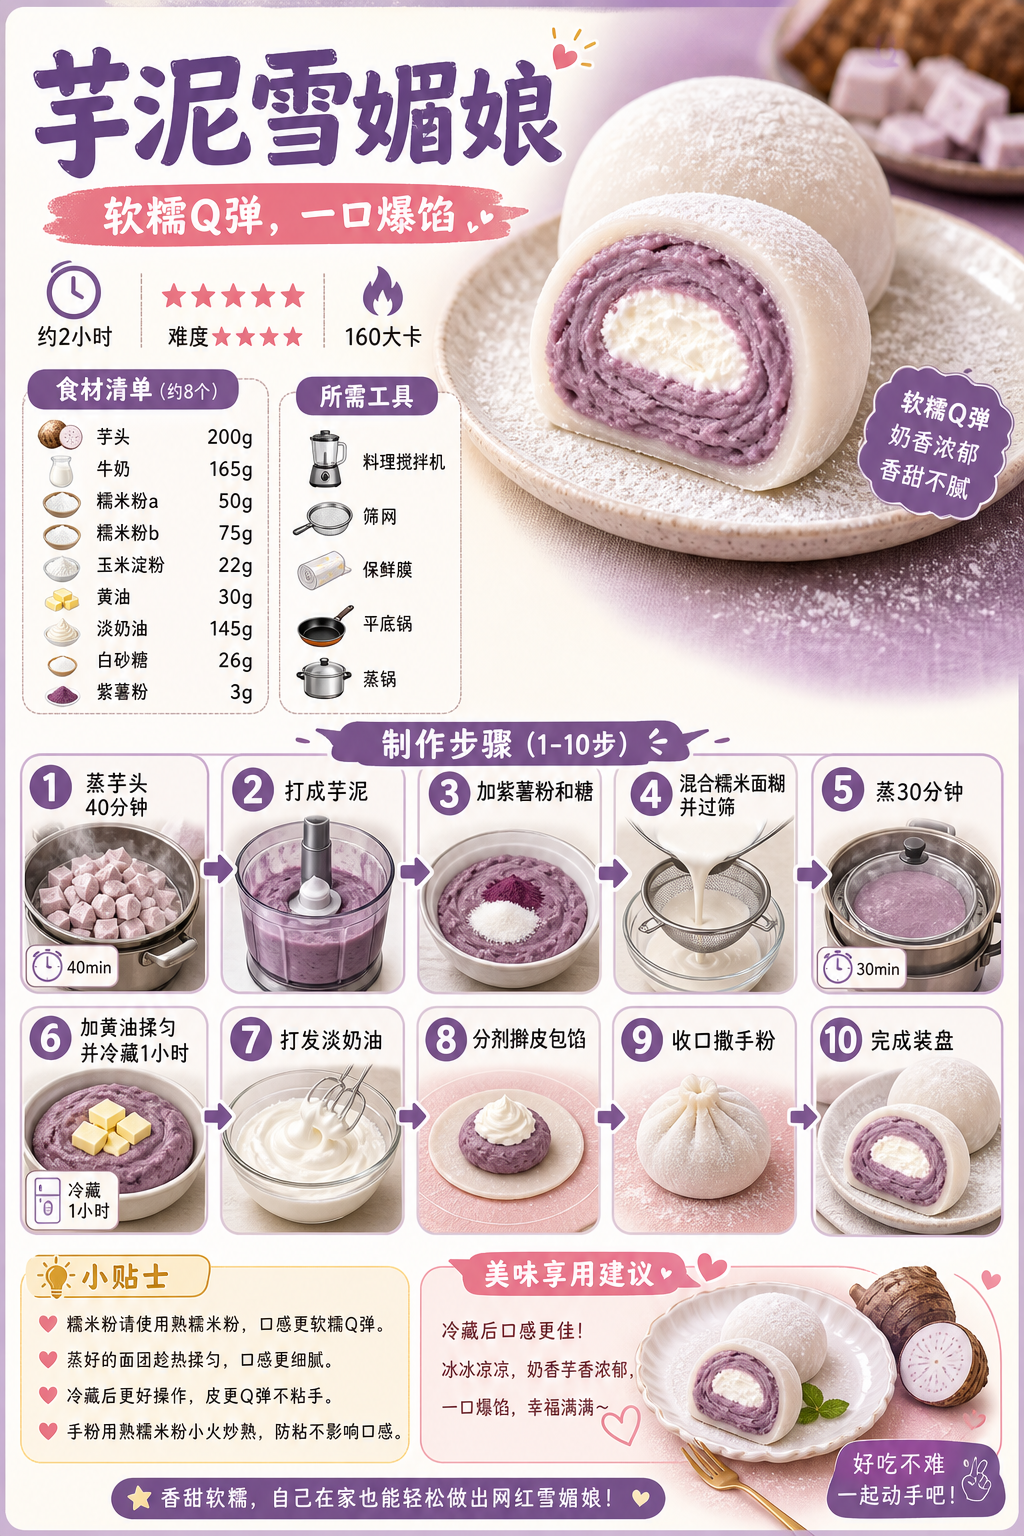
At a glance
Every ingredient and step on one sheet — worth pinning before you start.
Method10 steps
- 1
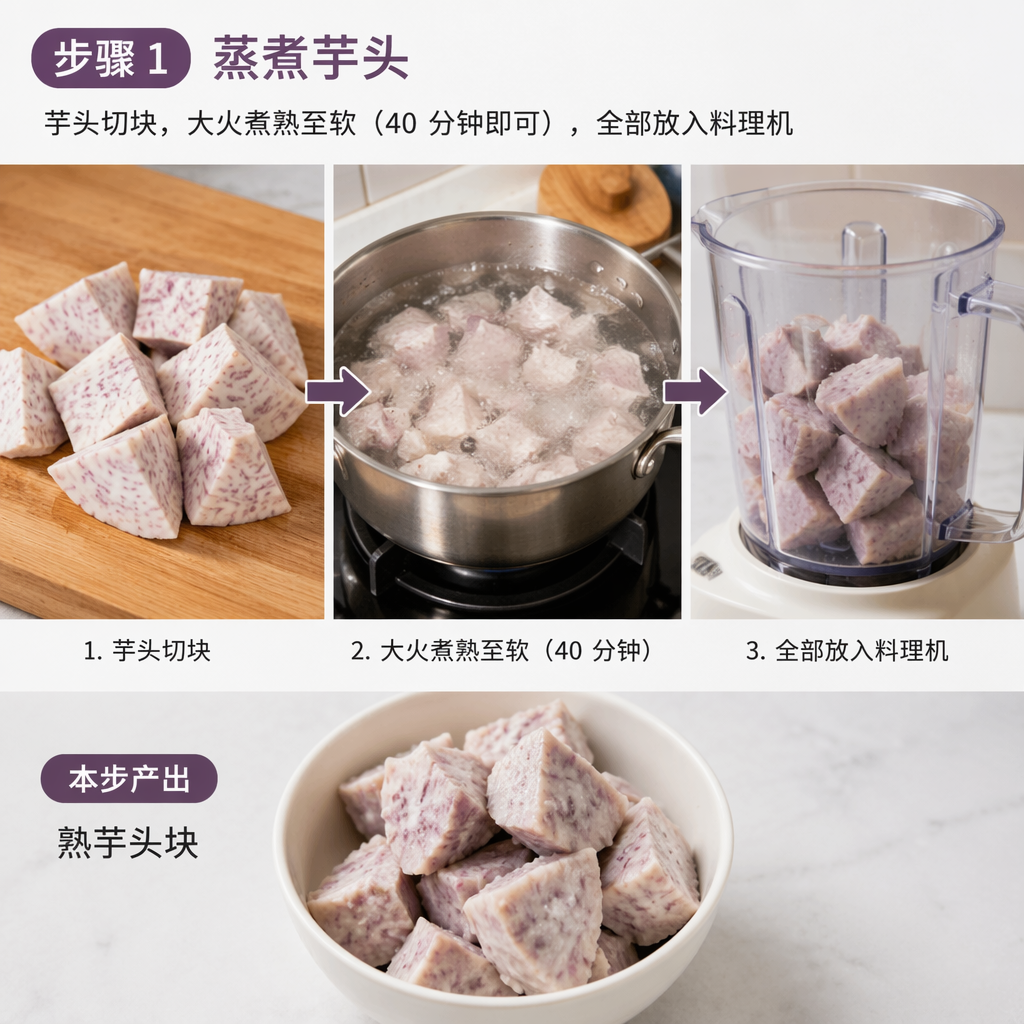
Steam and Boil the Taro
蒸煮芋头
Cut the taro into chunks and boil over high heat until soft (about 40 minutes). Transfer everything to a food processor.
芋头切块,大火煮熟至软(40 分钟即可),全部放入料理机
40 min
- Cutting into smaller pieces helps them cook faster.切小块一点更容易煮熟
- 2
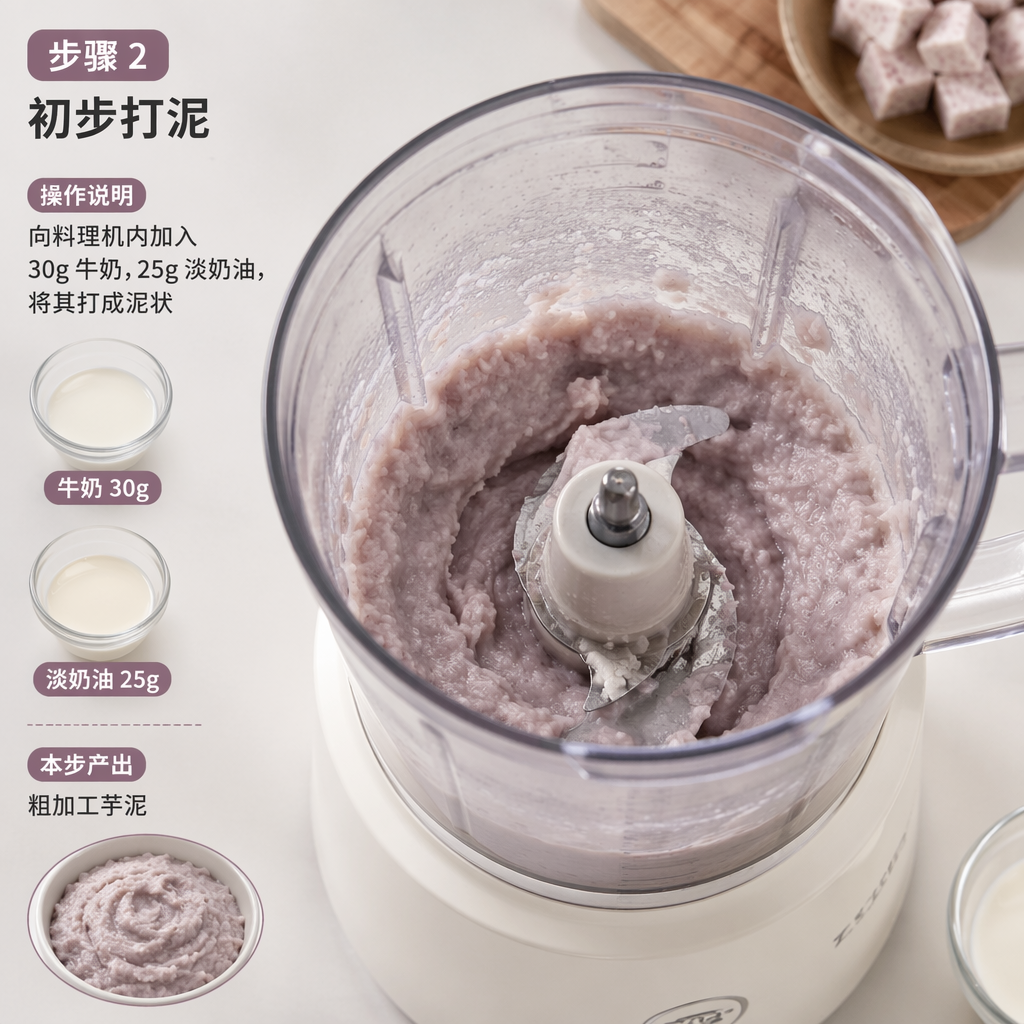
Initial Blending
初步打泥
Add 30g Milk and 25g Light cream to the food processor and blend into a smooth paste.
向料理机内加入 30g 牛奶,25g 淡奶油,将其打成泥状
2 min
- If you don't have a food processor, you can mash with a spoon and then pass through a Sieve.如果没有料理机,可以用勺子压碎再过筛
- 3
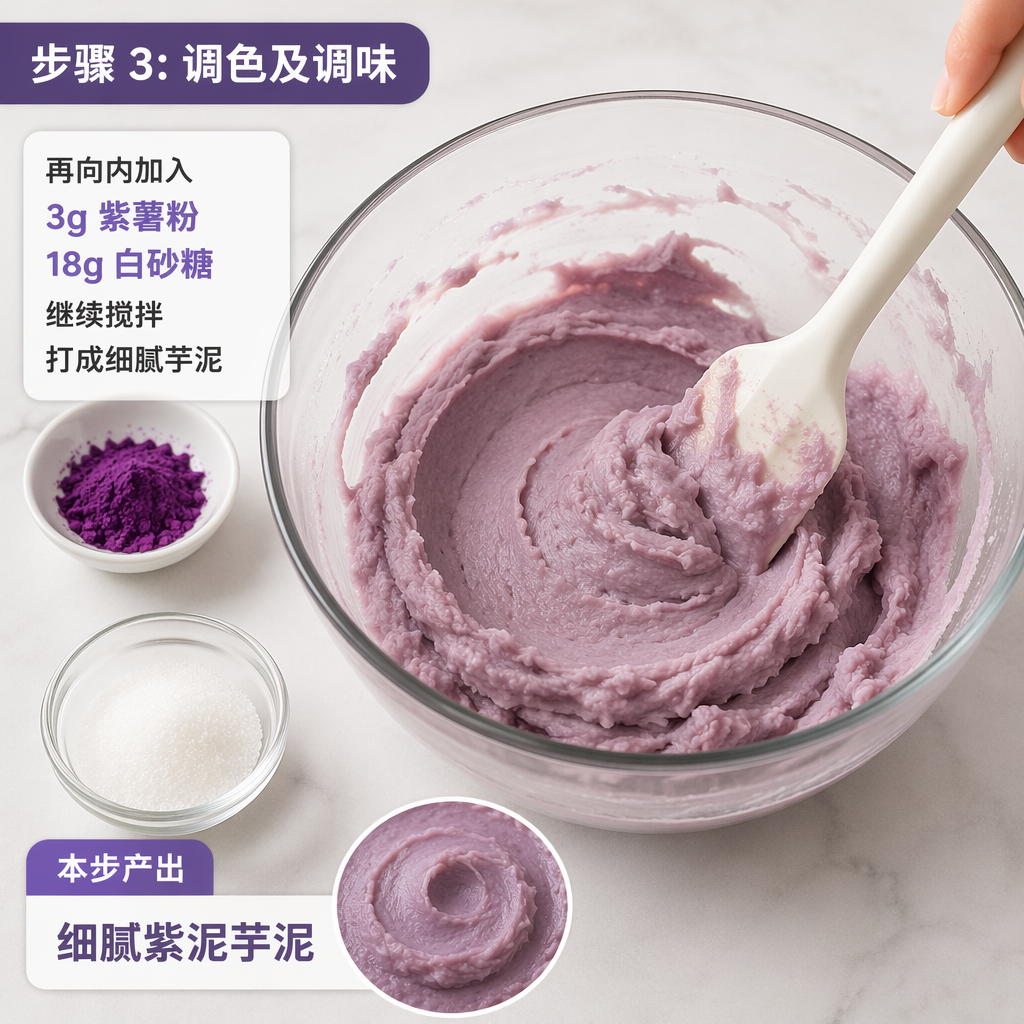
Coloring and Seasoning
调色及调味
Add 3g purple sweet potato powder and 18g Granulated sugar, then continue blending until you have a fine taro paste.
再向内加入 3g 紫薯粉,18g 白砂糖,继续搅拌打成细腻芋泥
2 min
- Purple sweet potato powder is mainly for coloring to make it look more appealing.紫薯粉主要起调色作用,使颜色更好看
- 4
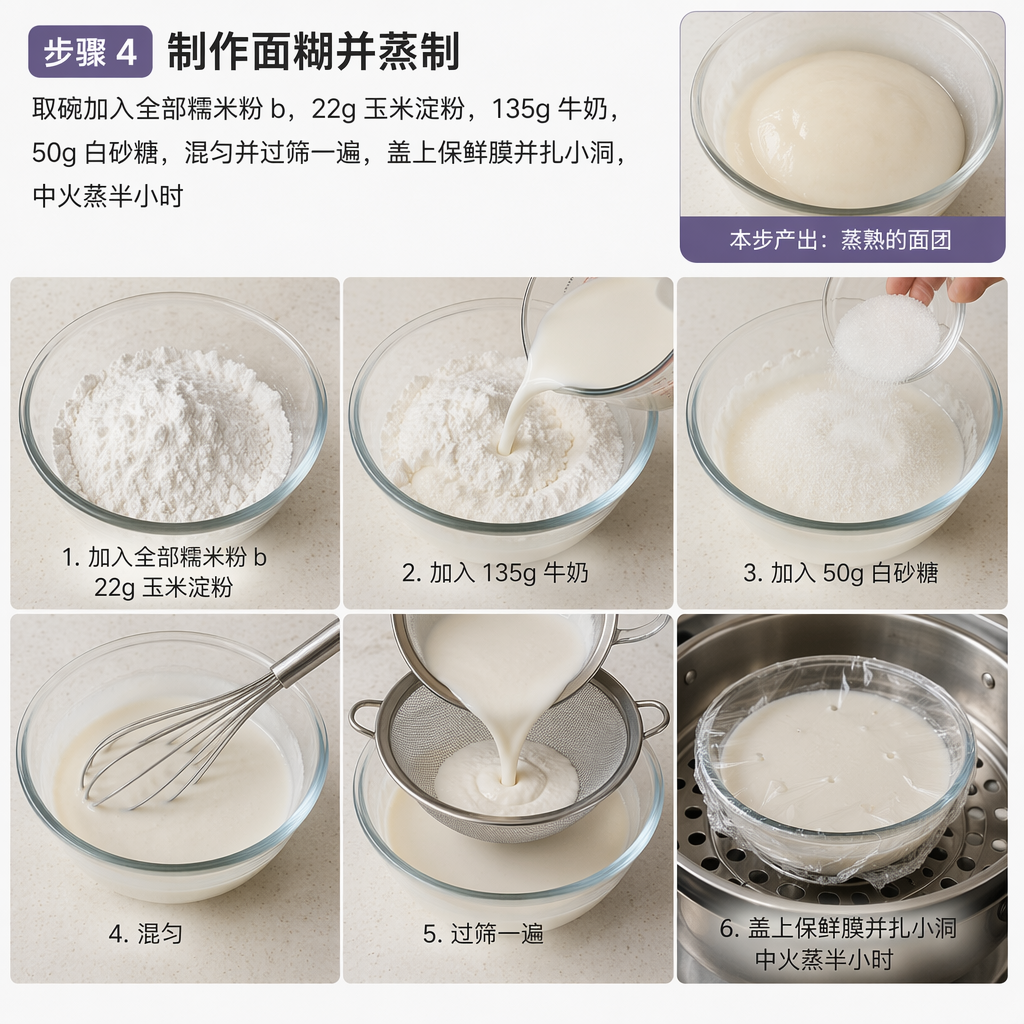
Make the Dough and Steam
制作面糊并蒸制
In a bowl, combine all the glutinous rice flour b, 22g Cornstarch, 135g Milk, and 50g Granulated sugar. Mix well and pass through a Sieve once. Cover with Cling film and poke small holes, then steam over medium heat for 30 minutes.
取碗加入全部糯米粉 b,22g 玉米淀粉,135g 牛奶,50g 白砂糖,混匀并过筛一遍,盖上保鲜膜并扎小洞,中火蒸半小时
30 min
- Sifting ensures a smooth, fine texture for the skin.过筛是为了确保面皮口感细腻
- Poking holes in the Cling film prevents steam condensation from dripping in.保鲜膜扎洞防止水汽滴入
- 5
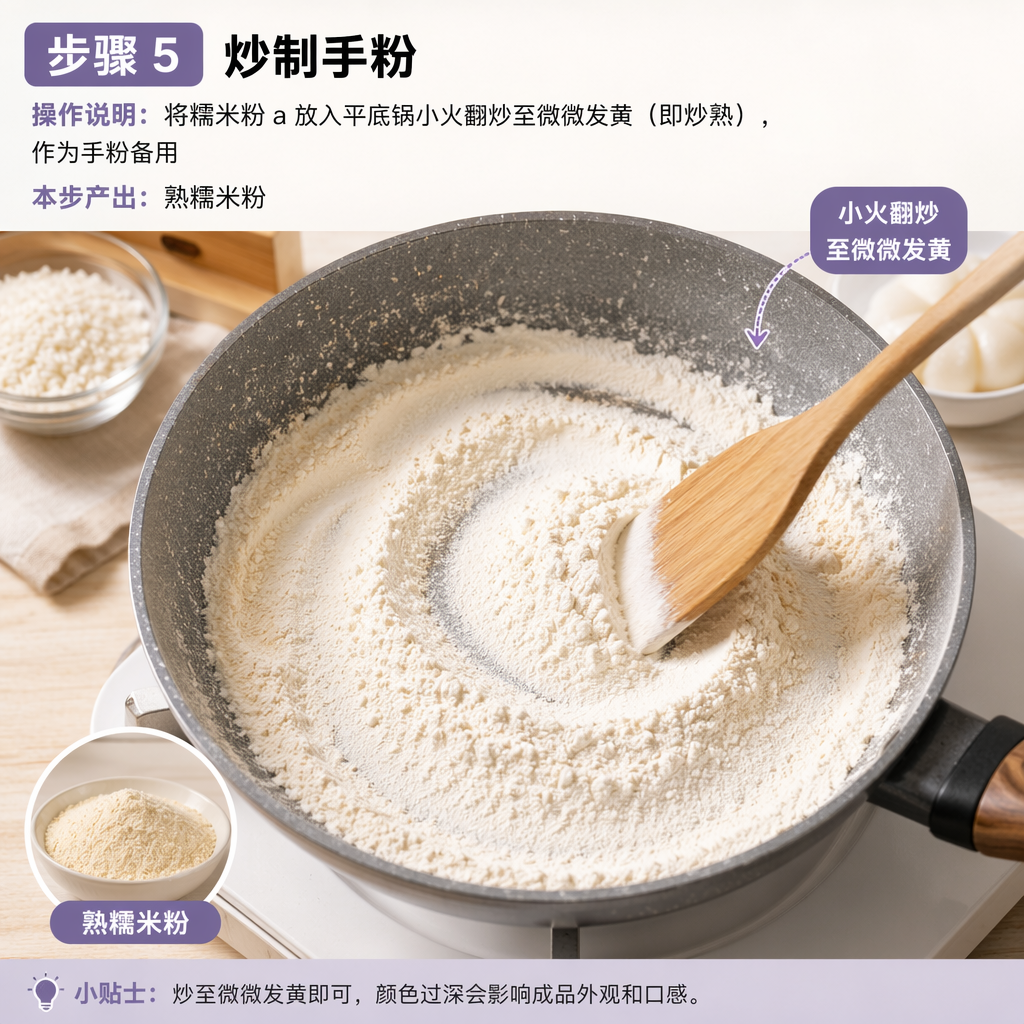
Toast the Hand Powder
炒制手粉
Place the glutinous rice flour a in a Skillet and toast over low heat until slightly yellowed (i.e., cooked through). Set aside as hand powder.
将糯米粉 a 放入平底锅小火翻炒至微微发黄(即炒熟),作为手粉备用
5 min
- Use low heat to prevent burning.必须用小火,防止炒焦
- 6
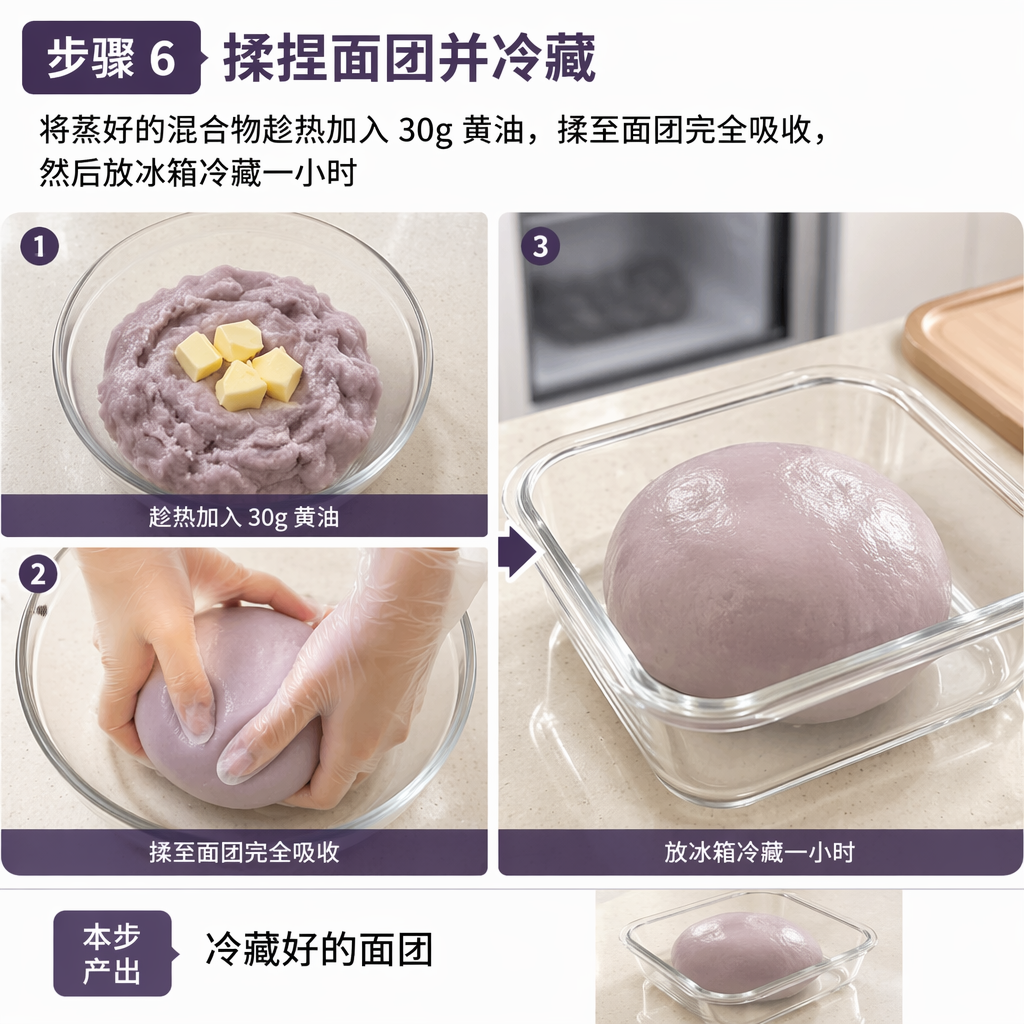
Knead the Dough and Chill
揉捏面团并冷藏
While the steamed mixture is still hot, add 30g Butter and knead until fully absorbed. Then place in the Refrigerator for one hour.
将蒸好的混合物趁热加入 30g 黄油,揉至面团完全吸收,然后放冰箱冷藏一小时
60 min
- It's very hot right after steaming, so wearing gloves is recommended.刚蒸好很烫,建议戴手套操作
- 7
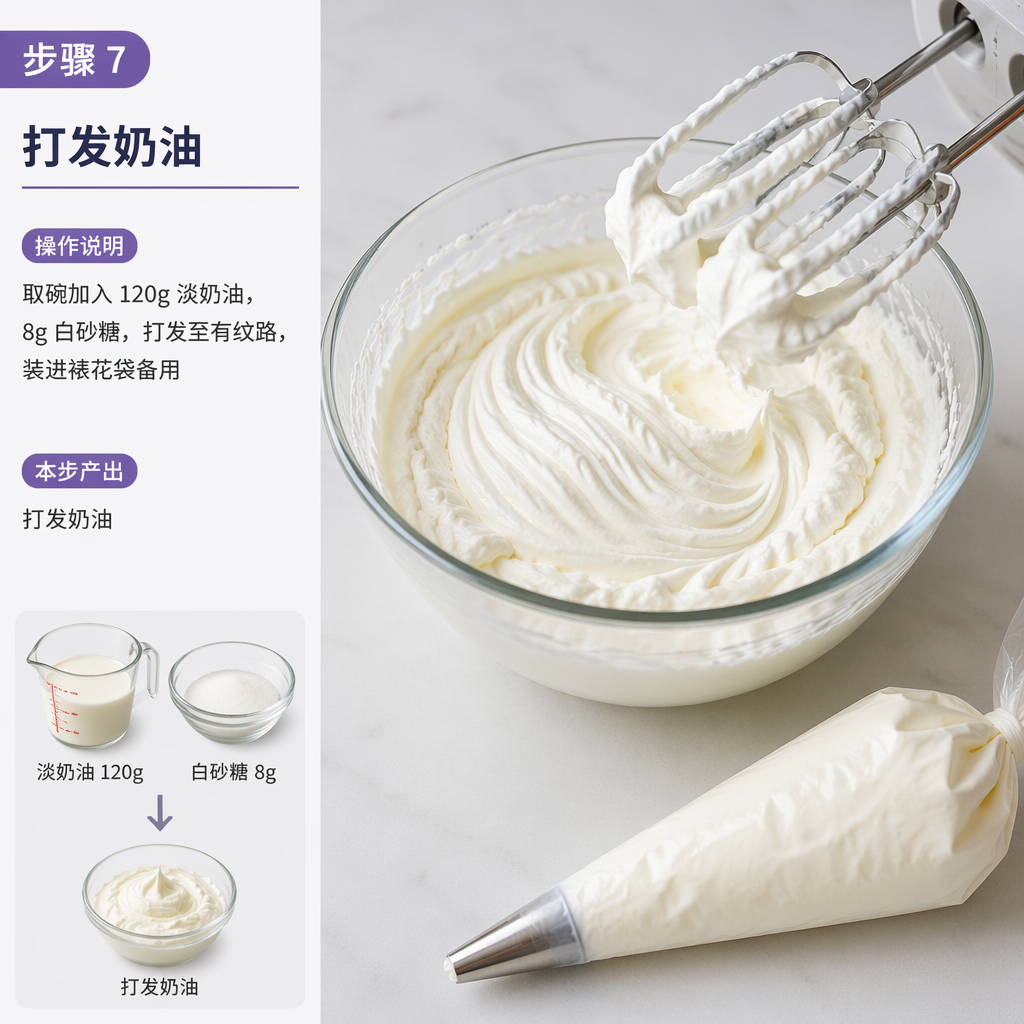
Whip the Cream
打发奶油
In a bowl, add 120g Light cream and 8g Granulated sugar. Whip until peaks form, then transfer to a Piping bag and set aside.
取碗加入 120g 淡奶油,8g 白砂糖,打发至有纹路,装进裱花袋备用
5 min
- The cream should be chilled before whipping.奶油需冷藏状态下打发
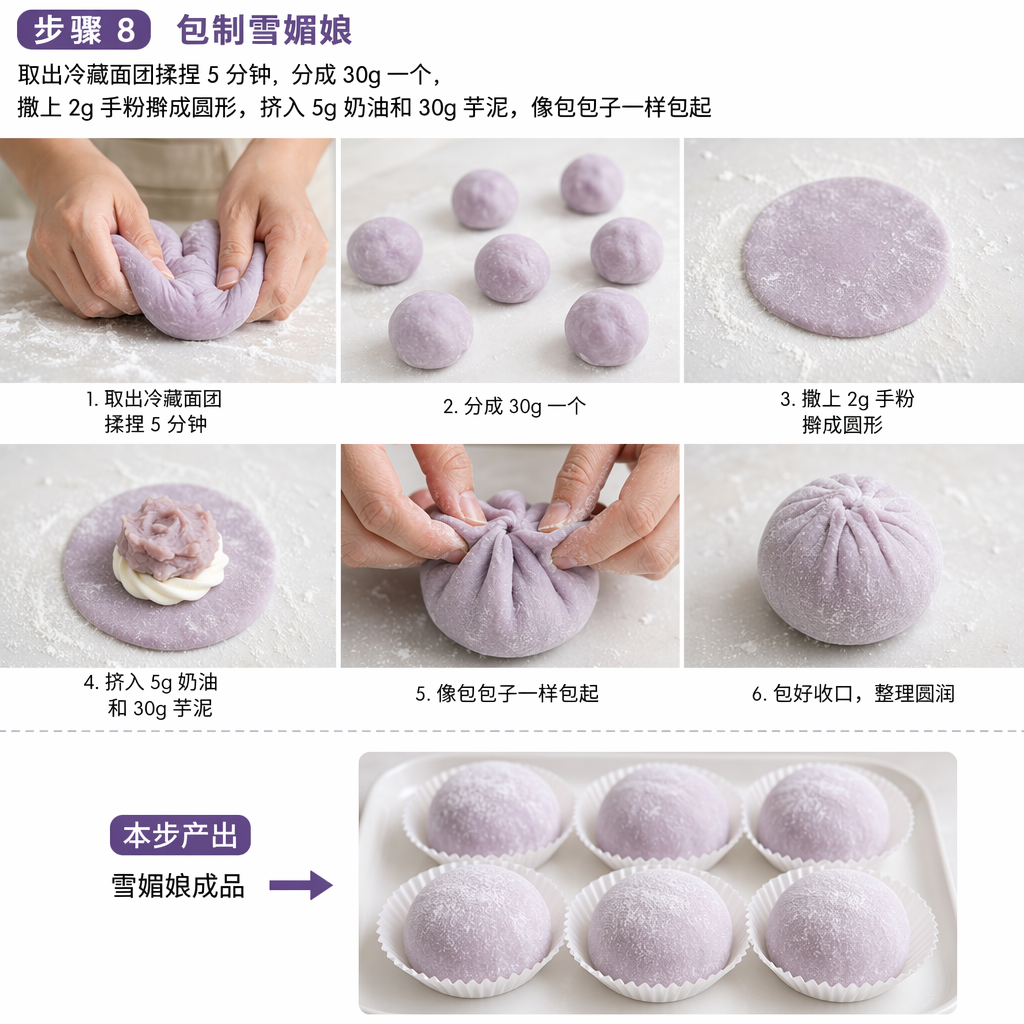
- 8
Assemble the Snow Skin Dumplings
包制雪媚娘
Take out the chilled dough and knead for 5 minutes. Divide into 30g pieces, dust with 2g hand powder, and roll into circles with a Rolling pin. Pipe in 5g cream and 30g taro paste, then wrap like a bun.
取出冷藏面团揉捏 5 分钟,分成 30g 一个,撒上 2g 手粉擀成圆形,挤入 5g 奶油和 30g 芋泥,像包包子一样包起
10 min
- You can trim the excess skin at the top for a neater shape.可以减去顶部多余的皮,形状更美观
- 9
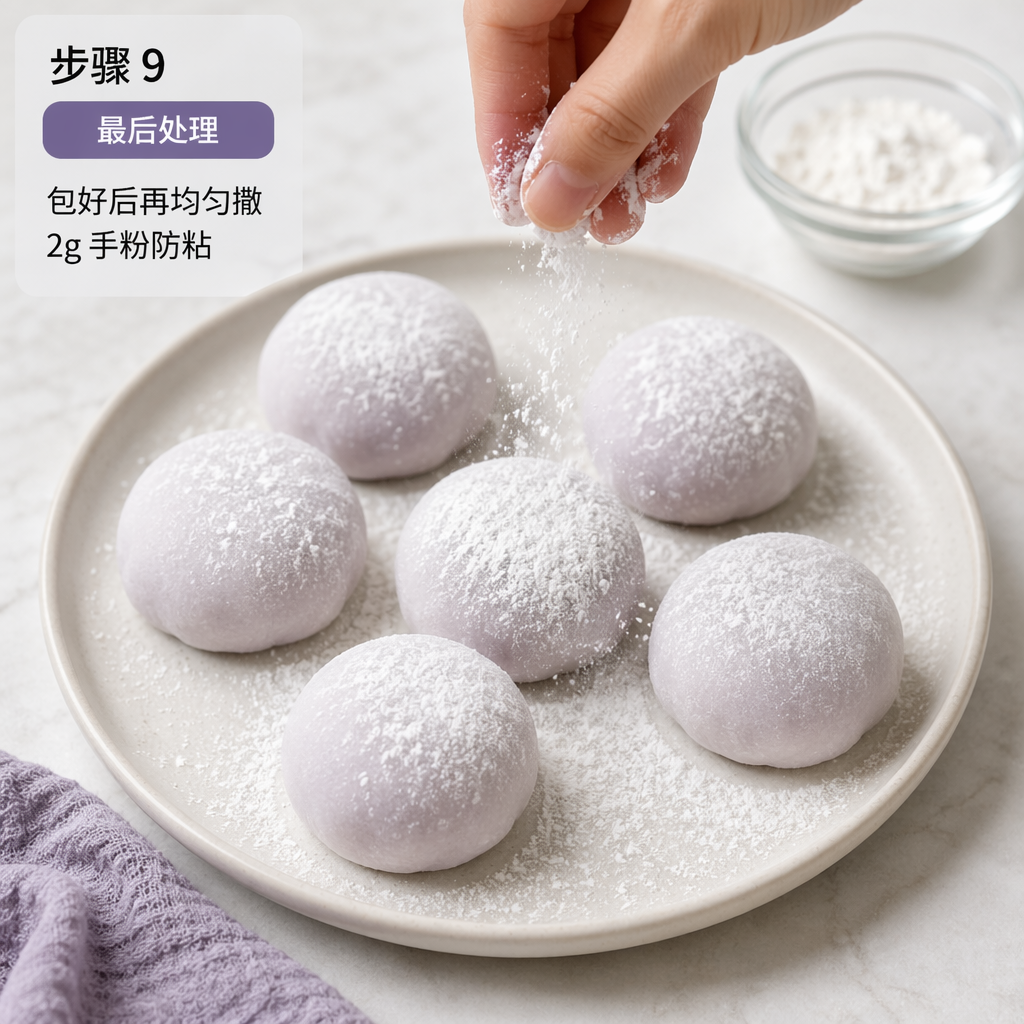
Final Touches
最后处理
After wrapping, dust evenly with 2g hand powder to prevent sticking.
包好后再均匀撒 2g 手粉防粘
1 min
- Don't use too much hand powder, as it may affect the texture.手粉不要撒太多,以免影响口感
- 10
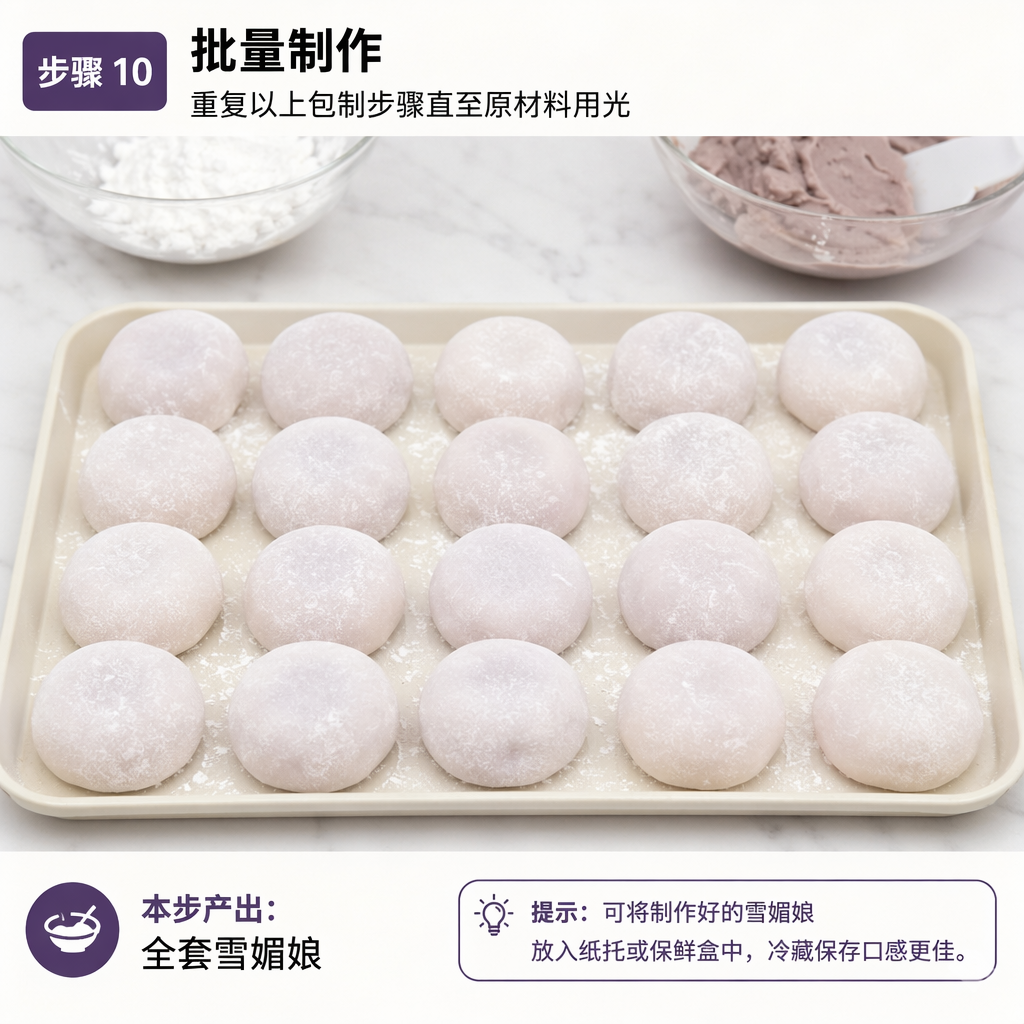
Batch Production
批量制作
Repeat the assembly steps above until all ingredients are used up.
重复以上包制步骤直至原材料用光
5 min
- Work quickly to prevent the skin from drying out.动作尽量快,防止面皮变干
Extra tips
- It's best to wear non-stick gloves while making these.制作时最好佩戴不粘手套
- They are ready to eat immediately after making, no reheating needed.制作完即可食用,不用再加热
- The texture is even better after chilling.冷藏后口感更佳